Wanted Fashionistas!

Tuesday, November 13, 2012

Red Carpet Gel Manicure Part 2

This is part 2 of my Red Carpet Gel Manicure blog, and the results are in.......I LOVE IT.  If you are wanting your manicure to last 10 days then this is the way to go.  My first go at it was a little bit of a process.  Now that I have the hang of it, I'm hooked.

Taking off the polish was actually super easy.  In fact you can either go with the remover kit that has the foil with the built in cotton to add the nail polish remover or simply get foil (the kind you use in your hair when you get highlighted) and cut a small piece of a cotton pad and place it directly on your finger.  (Both you can use regular nail polish remover on the cotton piece)Either way the process was relatively painless.

Since part one of my blog I've gone ahead and done 2 more manicures.  I even found a polish from the Red Carpet line that was extremely close to my favorite Chanel Frenzy polish.

I'm posting pics of the removal to show how easy it is.  If you are interested in trying gel manicures go with the Red Carpet starter or pro set.  You get more bang for your buck, plus the individual polishes are less expensive than others like Gel Pro Plus.

This is the site if you want to see more.Red Carpet Manicure


Wednesday, October 24, 2012

Red Carpet Manicure Gel Starter Kit

I decided to try the red carpet manicure gel starter kit for a little change of pace. I'm going through a lazy phase with my nails and I wanted something that would last more than a week. This stuff is supposed to last 10 days...Today is day 1.

There are many gel starter kits out in the market but I decided to try the Red Carpet manicure set that I came across at my local Ulta Store. They're all around the same price range, but I thought this kit looked the best. It comes in two types. The starter kit comes with a mini ultra violet light and the pro kit has the standard size UV light. The starter was less expensive so I went with that. The only downside to the starter kit is having the smaller UV light. The larger UV light takes 45 seconds to cure each layer and with the smaller UV light it takes 2 minutes.

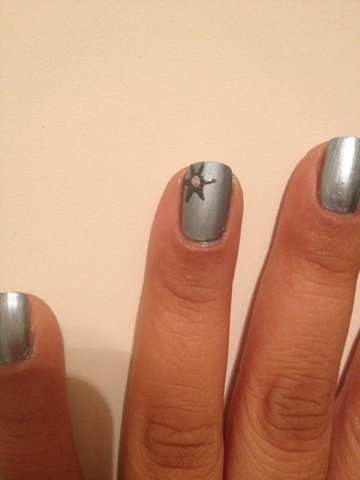
Another great thing is their color choices. They literally have 54 different colors where a lot of the others are limited to less than 20. The color I chose to try is 168 The Night is Young. It's a pewter shade and really nice.

My first pass at this was a little more time consuming since I'd never had a gel manicure. Between the prepping of one hand, the base coat, 2 coats of polish and the final top coat it took about 20 minutes per hand. It takes longer with the smaller UV light because you have to do the thumbs separate. So all together it took around 40 minutes. It takes me about 25 minutes to do a traditional manicure. If this really lasts 10 days it will be worth it.

The results of my first try are successful. I'm really pleased with how they look. The only thing I would change is I would've gotten the pro kit for the bigger light. That would have meant 45 seconds for each coat and thumbs would have been included. The smaller light really doesn't allow you to do all 5 fingers at one time.

The starter kit is around $59.95 and the Pro Kit is around $79.95. The polishes are $9.99.

I will let you guys know how it turns out after 10 days.

http://www.redcarpetmanicure.com

http://m.ulta.com/mt/www.ulta.com//ulta/browse/productDetail.jsp?productId=xlsImpprod3950155

Saturday, September 15, 2012

Best Body Scrub..Nivea Touch of Renewal Lathering Body Scrub

I have found this great body scrub/wash. I've been using it for a month and it makes your skin feel wonderfully clean and hydrated.

This scrub has micro beads and unlike other scrubs this lathers and leaves your skin soft and hydrated. It's very inexpensive and smells very clean.

I was just reading my fitness magazine and it was voted a Body Beauty Breakthrough. It truly is. Use this in conjunction with the Dial NutriSkin Firming Lotion to really give your skin a youthful glow!

Tuesday, September 4, 2012

Best Root Lift Ever

This past summer I've been trying to grow out my layers, but at the same time my hair has gotten really flat in the process.  I have very thick, course and long hair and without the layers my hair looses it's BOOM after about an hour.  I decided to try a root lift product to help give my hair some lift.

I stopped by my local beauty shop and I picked up a can of Redken Guts 10 root lift.  It looks like a can of hairspray but comes out like mousse.  I sprayed a little bit into my palms and rubbed it into my roots from the top of my hairline to the bottom and in between.  I blow dried my hair as usual with it flipped upside down and with my round boar hair brush.

Seriously, this stuff WORKS!  My hair was full of lift and body.  I even took a nap and my hair was still full after a quick flip.  I've never tried a root lift product before so I didn't have anything to compare it.  I think that if you're looking to give your hair some "Oomph" then this is IT!  Give it a try.
REDKEN guts 10
THE GOODS!

Friday, August 24, 2012

butter London "Union Jack Black"

Ok, I've traveled outside my comfort zone a little more today. I've decided to give butter London polish a try. It's a truly healthy polish. They are known for their products which contain NO Formaldehyde, NO Toulene, NO DBP, and NEVER have. It is truly a polish that's good for your nails.

The packaging is cute and it goes in super smooth. I'm really impressed with its quality.

I opted to try their true black glossy lacquer called "Union Jack Black". I was a little nervous. This is a really dark color for me. I REALLY LOVE IT!

Ulta really has a beautiful selection of colors. They also have some matching lip gloss which I will definitely be trying next. (butter LONDON official site)

Try it, you won't be disappointed.


butter LONDON: Union Jack Black. SavvyBeautyChick.blogspot.com
Union Jack Black
Union Jack Black: butter London 
WOW, classy not goth!


Quick link to Amazon for you...


Monday, August 20, 2012

The New Improved Buff Puf Gentle

Over the summer I've been noticing how huge my pores have looked and how I started to get black heads on my nose. I decided to try some things to make them go away.

I tried some pore minimizing lotion. That made my skin feel greasy. I tried Biore strips for my blackheads. It worked a little, but not enough for me to keep using.

I was talking to my favorite sales gal, Fran at my Walgreens and she suggested using a rotating face scrubber since the cause of my large pores and blackheads could be coming from dirt in my face that my face cleanser is just not getting clean. I looked at the prices and honestly $30.00 isn't what I wanted to spend since I've already spent a lot on my cleansing system.

As I stood there in the aisle with the $30.00 scrubber with an indecisive look, Fran made a great suggestion. She said to try the Buff Puf. I told her I used it years ago and that it hurt my face. She told me they made a new and improved "Gentle" version. I thought hmm at $3.99 for 2 puffs in the box it couldn't hurt to try it out.

WOW! To my surprise it was not only very gentle but got shrunk my pores to almost nothing and totally got rid of my blackheads on my nose. HURRAY something inexpensive that REALLY works! My complexion looks awesome and when I put my makeup on, my face looks airbrushed.

In the end I walked away a happy chick! I think everyone should try it!

Friday, August 17, 2012

White with Gray....OK!

After a month of dark colors with a bit of beige, I felt the need for a change of pace. I started out just wanting to do a plain pearlescent white using "It's All About the Glam" from the Kardashian collection of Nicole by OPI. I took a look at it and I thought it looked a little boring. I decided to jazz it up just a little.

I took my nail art tool and decided to use my CND "Asphalt" and just put dots on the left side of my nail and BOOM instant Jazzy!

Monday, August 13, 2012

BEACHY WAVES


I've been trying several different ways to create beachy waves in my hair.  It's been kind of frustrating trying to find the right hair tool to create the trendy look.

My first try why was using a waving iron.  The sales girl at Ulta said this would work for what I wanted.  Sorry Ulta salesgirl......YOU ARE SO WRONG.  I used this iron and damn if I didn't ended up with 80's crimped looking hair.  It was horrible.  I looked straight out of an 80's music video.  Needless to say it was definitely not the look I was going for.

The next item on my list was the TopStyler by the people that make my beloved InStyler.  I just knew that this would work.  I love my InStyler and I thought for sure after watching the infomercials that their latest tool the TopStyler would do the trick......Ummmm.......NO!  Very disappointed in this.  It looks visually wonderful, the idea seems to be great, but the curls........not it.  I was heartbroken.  I really wanted to love this and wanted it to work.  The curls made me look like a poodle.  I tried to make them as loose as I possibly could but still TOO CURLY! I spent several hours trying to make it work.  I returned it.

I was about to give up all together on the thought of the beachy wave look.  I decided to try a different route.  Beach Spray.  There are so many out there, but I wanted to find the right one, and I found it!  The product I bought was Marc Anthony's (not JLO's ex).  It's Dream Waves Beach Spray by Marc Anthony.  This stuff is really inexpensive ($8.95 Walgreens or Ulta for $8.99) and smells wonderful!  All you do is spray it starting at the roots all the way down to the ends on damp freshly washed hair.  Once you've sprayed it, then use a diffuser and scrunch your hair all or over.  I flipped my hair over and scrunched it until it was 3/4 dry. Then I took my round brush to give my bangs a little flair and voila.....beachy waves!

I'm happy with how it turned out.  It wasn't curly or crimped, just soft waves.  YAY!

Dream Waves Beach Spray by Marc Anthony!

Back left side of the my beach waves!

Right back side of my beach waves!

Front of my beach waves!

Thursday, August 9, 2012

My New Favorite Gray Family Polish

I've been on a quest the past few weeks for the perfect gray. I've finally found IT! It's China Glaze "Concrete Catwalk". LOVE, LOVE this stuff. It went on smooth and shiny! This is by far my favorite out of the ones I've tried.

As always I had to do my accent nail. I used China Glaze "White on White". Just a few cute little dots is all I needed.

This is one trend I'm loving right now.

Wednesday, August 8, 2012

CAKE PUSH-UP

Besides being obsessed with my nails.....haha!  I love making little treats for my kids birthday parties.  Every year I make something special for the kids and the parents to leave with as a "Thank You" for coming.  I've done special cookies and cupcakes. Last year I was obsessed with making cake pops.  This year I decided to make cake push-ups.

Do you remember the Flintstone orange sherbet push-ups?  Well now you can make them with cake.  It's the latest thing.  You can buy the push-up container at any cake supply site or go straight to Amazon.  They are very affordable ($11.95 for a dozen). These are honestly super easy to make.  You can make just about any kind of combination of cake, frosting, whip cream, fruit, candy....I could go on.

Tonight I decided to do strawberry shortcake push-ups.  I baked a pound cake and then cut them into circles (I used part of the push-up container to make the circles).  I cut fresh strawberries and then sprinkled a half tablespoon of sugar on them and mixed it and set it overnight in the refrigerator.  I used whipped cream from the can for convenience.

The next thing I did was assemble the push-up container. Then I placed 1 cake round at the bottom, a layer of whipped cream, a layer of strawberries.  I then repeated the process one more time and topped it off with some whipped cream.


Check out my video to see just how easy it was. http://youtu.be/c7O-PFK3TwY
Strawberry Shortcake Push-Up

Monday, August 6, 2012

bareMinerals: Mineral Veil Compact


Let me just start by saying "This stuff ROCKS".  I've been using bareMinerals for over 6 years and it's awesome.  When they first came out I was just so impressed with the product, but I didn't care for the portability.  I've messed up many nice make up bags, because the powder kind of went everywhere.


In the last year they have come out with some really great changes and new items.  They added a click lock to sifter for its foundation and mineral veil.  Which is really great. They've since added a mineral veil compact. 

This is truly wonderful.  They come in translucent (which I use in the winter). They also have the tinted mineral veil which is what I'm using now for the summer.  The compact is very sleek and it comes with a little powder applicator that works ok.  I like to use a compact brush to apply when I'm on the go, but I use the puff that comes with it too.  It's everything the regular mineral veil does (decreases pores and reduces redness and shine) just in a wonderful compact.  

You can get this at Ulta for $22.00 or at any makeup counter at the department store that carries Bare Minerals.  Buying directly from their site bareMinerals .

bareMinerals: Tinted Mineral Veil Compact

Sunday, August 5, 2012

Shades of Gray

Hello everyone! I've been on a quest for a great shade of gray. The other day I wrote about the first shade In my quest for the perfect gray which was "Stone Cold" by China Glaze. The last couple of days I tried 2 more.

The first shade was "Asphalt" by CND. It's a dark gray with a bluish tint. It's really nice. I didn't care for the brush. It's way too short and narrow. I had a hard time putting it on without hitting my cuticle. I did an accent nail "Sparklicious" by OPI.

Tonight I decided to try another shade of gray. "French Quarter for your Thoughts" by OPI. This has a bit of taupe to the shade. I actually dig this shade a lot.

I have another shade I'm going to try. I'm just waiting for it to come in from Amazon. For now you decide, which one is the coolest of the grays.

Thursday, August 2, 2012

Feeling Stone Cold!

My dark side is emerging!!!! LOL, I'm talking about nails people! Here's the latest. It looks like dark nails are here just in time for fall. Gray and charcoal are the must have colors. I went into my nail polish stash and pulled out my China Glaze polish "Stone Cold". This color was originally part of their Hunger Games collection. It's a matte steel colored polish.  If you use a glossy top coat,  it changes the color from matte to glossy. I like it both ways, but I'm feeling shiny tonight.

I tried it two ways. I also added my must have signature nail accent to add a little more sparkle. I used OPI "Sparkleicious" as my accent nail.
China Glaze "Stone Cold" Hunger games collection
Seche Vita Top Coat to create a glossy look. Accent Nail OPI Sparklicious
The products used!

Wednesday, August 1, 2012

Spider-Man Meets the Grateful Dead!

My wonderful husband got me the coolest set of OPI Mini's, The Amazing Spider-Man Collection.  It's a cute little set. It comes with a cool purple/blue, a cement color, metallic green, and a pretty pink.

I used the pink color "Your Web or Mine?" and for my accent nail I used Sally Hansen Salon effects Tie Dye look polish strip!  It looks really cute.


Monday, July 30, 2012

Dry Shampoo/Conditioners.......Oh YES!

Dry Shampoo has been around for a long time. I tried it for the first time 7 years ago. Back then it was a colored powder in a squeeze type of bottle. I have dark brown hair and my only option was black, which didn't quite match. It was also messy and thick. I used Bumble and Bumble and that wasn't cheap. I think it cost almost $40.00 a bottle. Needless to say I stopped using it after a week.

Now a days you can get it in a spray can and it comes out very fine, and when used correctly clear. There are many brands out there from a $25 can from the salon to $3.00 at a retail store like Walgreens. All you do is spray it towards the roots of your hair so it soaks up the excess oil. Then you can also flip you hair upside down and spray lightly. Don't spray too close or you'll look like you have strands of white hair.

I've tried Tresseme and it works good but it wreaks. Dove has it too and it smells nice.

The one I love is by Suave. I know you're probably flashing back to those commercials where they show how salon experts can't tell the difference between a salon shampoo and Suave. Those commercials weren't talking about their dry shampoo. They probably should. Hmmm I think they do. I can't remember. Sorry I digress.

This stuff isn't only inexpensive it really works well and smells great. Another great thing is they have 3 types. You can buy the regular dry shampoo or dry conditioner, or their Keratin infused dry shampoo. I prefer the dry conditioner. It soaks up excess oil in your hair and freshens up your hair with a light pleasant scent. The dry conditioner also gives it a nice shine that isn't greasy like glossy sprays. I like using it in the middle of the day to liven up my hair. It's also great when you want to curl your hair. It really helps set the curl and style.

If your a person that washes your hair every other day this is perfect. It doesn't clean your hair but it does help give you a fresher feeling in between washes. I like both the shampoo and conditioner, but I what I use everyday is the conditioner.

Try it, and you'll feel the same!

Sunday, July 29, 2012

Feeling Blue with some BAM!

Ok nail time! Essie has a wonderful metallic collection out right now. They have a metallic blue, copper, metallic lilac and silver. I was feeling "Blue".

It had a different consistency from your average color. I found using one really good coat worked best. Once I finished I thought, "I still need some pizzazz". As if the metallic blue wasn't enough. I decided to make my accent nail by using Essie's Matte top coat to dull the metallic. Then I took my OPI "I Have a Herring Problem" which is like a denim blue. I used my my nail art brush and did a drop of the OPI and then took the brush and kind of starred it out. I topped the little design with a little dot of the Essie Metallic Lilac. BAM quick art.

I've gotten so many compliments the past couple of days. I was even at Ulta the other day and a couple of women were commenting on the Essie display of metallics. I walked by and flashed my hand, and they both ended up buying the polish.

Polishes used Essie Blue Rhapsody and Nothing Else Metals, Essie Matte finish, OPI I Have a Herring Problem.
Finished Product
Essie Blue Rhapsody and Nothing Else Metals, Essie Matte finish, OPI I Have a Herring Problem.
My quickie design!

Friday, July 27, 2012

You Brighten Up My Face!


Face highlighters are great.  They can give you a more refreshed awake look, if you place it under your eyes.  It can also help with contouring areas like your nose to give it a smaller or thinner appearance.  I've been kind of experimenting with two highlighters this summer.  One is by Bobbi Brown Cosmetics and the other is by Bare Minerals.  Both brands I love.  I use a lot of Bobbi Brown's lip and eye collections.  As for Bare Minerals, I cannot live without their foundation and mineral veil.

I like what they both do for me just about the same.  It really comes down to convenience. Bare Minerals has a great highlighter called "Exquisite Radiance".  The name speaks for itself.  Its a very subtle and light mineral that you apply with a small contoured brush.  It goes on very smooth and gives you a nice bright eyed look when you put it under your eyes and works great with contouring your nose when you brush it down the middle (on the bridge of your nose). As you know, with minerals, it can get kinda messy in your makeup bag. Carrying it around in your purse might not be the right option. 

The really wonderful thing about the Bobbi Brown Highlighter is that it's a pen.  Well more like a thick marker.  It's very convenient to carry around in a tiny purse when you go out or to just throw into your gym bag or purse.  To use this, you merely click the bottom of the pen a couple of times until you start to see the highlighter creme in the brush.  You can either take the brush directly to your face or what I like to do is take my finger and swipe some off the brush.  Then I'll dab it under my eyes to brighten or I'll dab around the apple of my cheeks (after blush and bronzer of course) to give my cheek bones some definition.  You can also put it on your nose to create a contour.

They are similar in function but in a different price point from one another.   Bobbi Brown sells it on their site for $32.00 and in 3 colors Rose(I use), Opal and Bronze.  Bare Minerals "True All Over" Face color is what they use as a highlighter (they don't call it a highlighter but its use is basically similar). On the Bare Minerals site it's $19.00.  What I did was opt for the Bare Minerals Bare to Color Guide Warm.  I opted for this because I got more bang for my buck and I just LOVE Bare Minerals. This was $39.00 and came with the following:
  • Prime TimeTBrightening Eyelid Primer (luminous golden sheen)
  • Zany Eyecolor (soft tarnished gold) (size: small)
  • Round the Clock Waterproof Eyeliner in 10 PM (burnished mocha)
  • Exquisite Radiance All-Over Face Color (size: small) (This is what I use)
  • Mini 100% Natural Lipgloss in Apricot Nectar
  • Double-Ended Precision Eye & Cheek Brush (I use this to apply the radiance)
You can go either way, I happen to love both.  It all depends on the occasion.  

This is the wonderful double sided brush I use that comes with the Warm Collection Warm Collection

Bobbie Brown Highlighter Pen in Rose $32.00 Bobbi Brown

Bare Minerals Exquisite Radiance from the Bare Guide to Warm $39.00 Bare Minerals


Tuesday, July 24, 2012

Mochachino with a Splash of Crackle Anyone?

Hello to all my glamor girls!  I just tried a really nice color manicure with an accent nail that looks really HOT!  I'm really getting into the fall colors.  Yes, I know it's still summer but a girl can still experiment.  I used Essie's "Mochachino" its a rich taupe with a little bit of sparkle.  I then did my accent nail in a black crackle polish by OPI.  I wasn't sure I was going to like it.... Guess what I LOVE IT!  It's a nice look for work or going out on the town.  Let me know what you think.  

Essie Mochachino without the accent nail.....Pretty

Essie Mochachino with Black Crackle by OPI accent nail....HOT

Sunday, July 22, 2012

Teaching Your Child How to Tie Their Shoes

Hi everyone! I know my blog has been focused on beauty tips and tricks lately, but I also like to blog about family tricks and finds. So here is what I wanted to share with any parents, care givers, teachers.

I've been surprised by a lot of things children these days know how to do with technology. I'm even more surprised at the small things that kids CANNOT do these days. In an age where Velcro shoe fasteners are available in just about every kind of shoe you can imagine, it's no wonder kids haven't learned to tie their shoes. I remember as a child that if I wore any kind of athletic shoe it had laces. The only time I didn't have laces was in my patent leather dress shoes or summer sandals. In the last year I've come across children who were in 2nd, 3rd and 4th grade who didn't know how to tie their shoes.

My oldest son, who turned 5 this year was also not able to tie his shoe laces. I thought "I can show him no problem." I tried to show him the bunny ear technique, but he just couldn't understand what I was doing. I thought to myself there has got to be a fun and easy way to teach this skill to him without getting him or myself frustrated.

I came across a book at his school book fair called "One, Two, Tie Your Shoes!" by Lorraine Gregory. This book is so simple and fun looking, but genius at the same time. My son literally took the book for 30 minutes and BAM he was able to tie the laces on the book. He then put his new pair of athletic shoes on and tied both his laces. In the book it shows you 3 ways to tie them with a matching rhyme. My son was so proud! (not to mention both my husband and I)

To all you out there trying to find a fun way to teach your kids to tie their shoes, buy this book!

Friday, July 20, 2012

Subtle, Understated and Classy Nails

I was looking for something subtle and simple.  I came across the new fall nail lacquer collection by Chanel. They have 3 colors for 2012 and one of them is Frenzy.  It's very elegant and neutral.  Sometimes subtle is better than bold. I used 1 coat to give a lighter barely there look.  I also tried with 2 coats, which does deepen the tone and is still very pretty.  I prefer it lighter.

I normally don't buy Chanel polish because it's pricey. I couldn't resist buying it this time. The color is a great natural hue for fall and even right now. Chanel polish is usually $26-$30.  Essie offers a similar color called "Topless and Barefoot" which is pretty close.  That costs around $8.

When you want a change from the bold summer colors give this a try. 

Chanel Frenzy #559 1 coat
Chanel Frenzy #559 2 Coats a bit deeper

Thursday, July 19, 2012

SUMMER TO FALL TOOTSIES

I'm not one to be too trendy, but I couldn't help myself with this comeback kid.  The moccasin apparently has come back into fashion.  My fashionista cousin mentioned it on her pintrest. Then I was reading my InStyle magazine and fashion designer Tory Burch mentioned the suede flats being a great summer to fall shoe.  Finally I saw on a must have shoes list for fall, that Minnetonka moccasins are back in style.  I was tempted to make the plunge, but still I hesitated.  Then I remember my first pair of Minnetonka moccasins in white I had in the late 80's.  I literally wore them everyday. I thought this is one comeback I'm going to have to go with.

I searched the net for the right moccasin.  I found the Minnetonka Thunderbird Soft Sole Suede.  I thought now there is a cute shoe.  It's the look of my favorite moccasin with the soft suede material.  Did I mention it came in one of my favorite colors to wear in the fall and winter.....GRAY!  So my next task since I'd found the shoe was to find the perfect price.  Then BOOM! Amazon had them for $35.95 and with my Amazon Prime 2 day shipping was free.  Amazon processed it so fast I got it the next day.  Now that's a deal! These retail around $35.00 - $39.00.

Here they are and they are super comfy.  It's like wearing slippers.  LOVE THEM.  Might have to get a second pair in brown.


Wednesday, July 18, 2012

PRETTY IN PINK

 
For over 15 years I've had the same manicure my typical French Manicure.  This past year I decided to make a change by actually venturing outside my comfort zone and try new trendy nail colors.

This week was another step outside my comfort zone, with a bright pretty summer pink.  It’s by OPI and it’s part of the Vintage Minnie Mini set. It’s called “If You Moust you Moust”. It’s really cute.  I also wanted to add my new obsession, the accent nail. It’s very subtle and just gives the manicure a little sparkle.  For my accent nail I used Essie Luxeffects in“Pure Perfection”.  It’s a silvery pearl sparkle.
Hope you like it.  If you’d like to see any other colors or nail art, send me a message and you just may see it in my blog ;)


With the accent nail.  See the sparkle.  Very subtle!
Essie Luxeffects, Minnie Minis by OPI, and Seche Vite top coat
Without the accent looks pretty too!